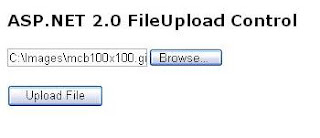
ASP.NET 2.0 has a FileUpLoad control, which allows developers to drop the control on a page and let it browse a file and upload it on the server.
To create a control, simply drop the FileUpload control from Toolbox to a Web page. The following code adds the FileUpLoad control:
<asp:FileUpLoad id="FileUpLoad1" runat="server" />
To support file upload, we need to add a Button control:
<asp:Button id="UploadBtn" Text="Upload File" OnClick="UploadBtn_Click" runat="server" Width="105px" />
Now on this button click event handler, we need to call SaveAs method of FileUpLoad control, which takes a full path where the file will be uploaded.
protected void UploadBtn_Click(object sender, EventArgs e)
{
if (FileUpLoad1.HasFile)
{
{
if (FileUpLoad1.HasFile)
{
FileUpLoad1.SaveAs(@"C:\anil\" + FileUpLoad1.FileName);
Label1.Text = "File Uploaded: " + FileUpLoad1.FileName ;
}
else
{
Label1.Text = "No File Uploaded.";
}
}
Label1.Text = "File Uploaded: " + FileUpLoad1.FileName ;
}
else
{
Label1.Text = "No File Uploaded.";
}
}
Now if you run the sample, browse a file, and click on Upload File button, the output looks like below Figure .
Figure FileUpLoad control in action
Restricting File Types
You can restrict the FileUpload control to upload a file type. For example, I wanted to upload images (Jpgs and Gifs) only so I put a validator, which allows Gifs and Jpegs only.
<asp:RegularExpressionValidator
id="FileUpLoadValidator" runat="server"
ErrorMessage="Upload Jpegs and Gifs only."
ValidationExpression="^(([a-zA-Z]:)|(\\{2}\w+)\$?)(\\(\w[\w].*))(.jpg|.JPG|.gif|.GIF)$"
ControlToValidate="FileUpload1">
</asp:RegularExpressionValidator>
id="FileUpLoadValidator" runat="server"
ErrorMessage="Upload Jpegs and Gifs only."
ValidationExpression="^(([a-zA-Z]:)|(\\{2}\w+)\$?)(\\(\w[\w].*))(.jpg|.JPG|.gif|.GIF)$"
ControlToValidate="FileUpload1">
</asp:RegularExpressionValidator>
Figure 3. Validating images only.
By this code we can upload the the file only up to size of 4MB . If you trying to upload more than 4 MB it shows error and this is why?
The default size of files uploaded by the FileUpload control is 4MB. So if you try to upload the files larger than 4MB, it won't let you do so. To do so, you need to change the default file size in machine.config.comments file for maxRequestLength of httpRuntime tag. This number is in KB.
<httpRuntime
executionTimeout = "110" [in Seconds][number
maxRequestLength = "4096" [number]
requestLengthDiskThreshold = "80" [number]
useFullyQualifiedRedirectUrl = "false" [true|false]
minFreeThreads = "8" [number]
minLocalRequestFreeThreads = "4" [number]
appRequestQueueLimit = "5000" [number]
enableKernelOutputCache = "true" [true|false]
enableVersionHeader = "true" [true|false]
apartmentThreading = "false" [true|false]
requireRootedSaveAsPath = "true" [true|false]
enable = "true" [true|false]
sendCacheControlHeader = "true" [true|false]
shutdownTimeout = "90" [in Seconds][number]
delayNotificationTimeout = "5" [in Seconds][number]
waitChangeNotification = "0" [number]
maxWaitChangeNotification = "0" [number]
enableHeaderChecking = "true" [true|false]
/>


No comments:
Post a Comment